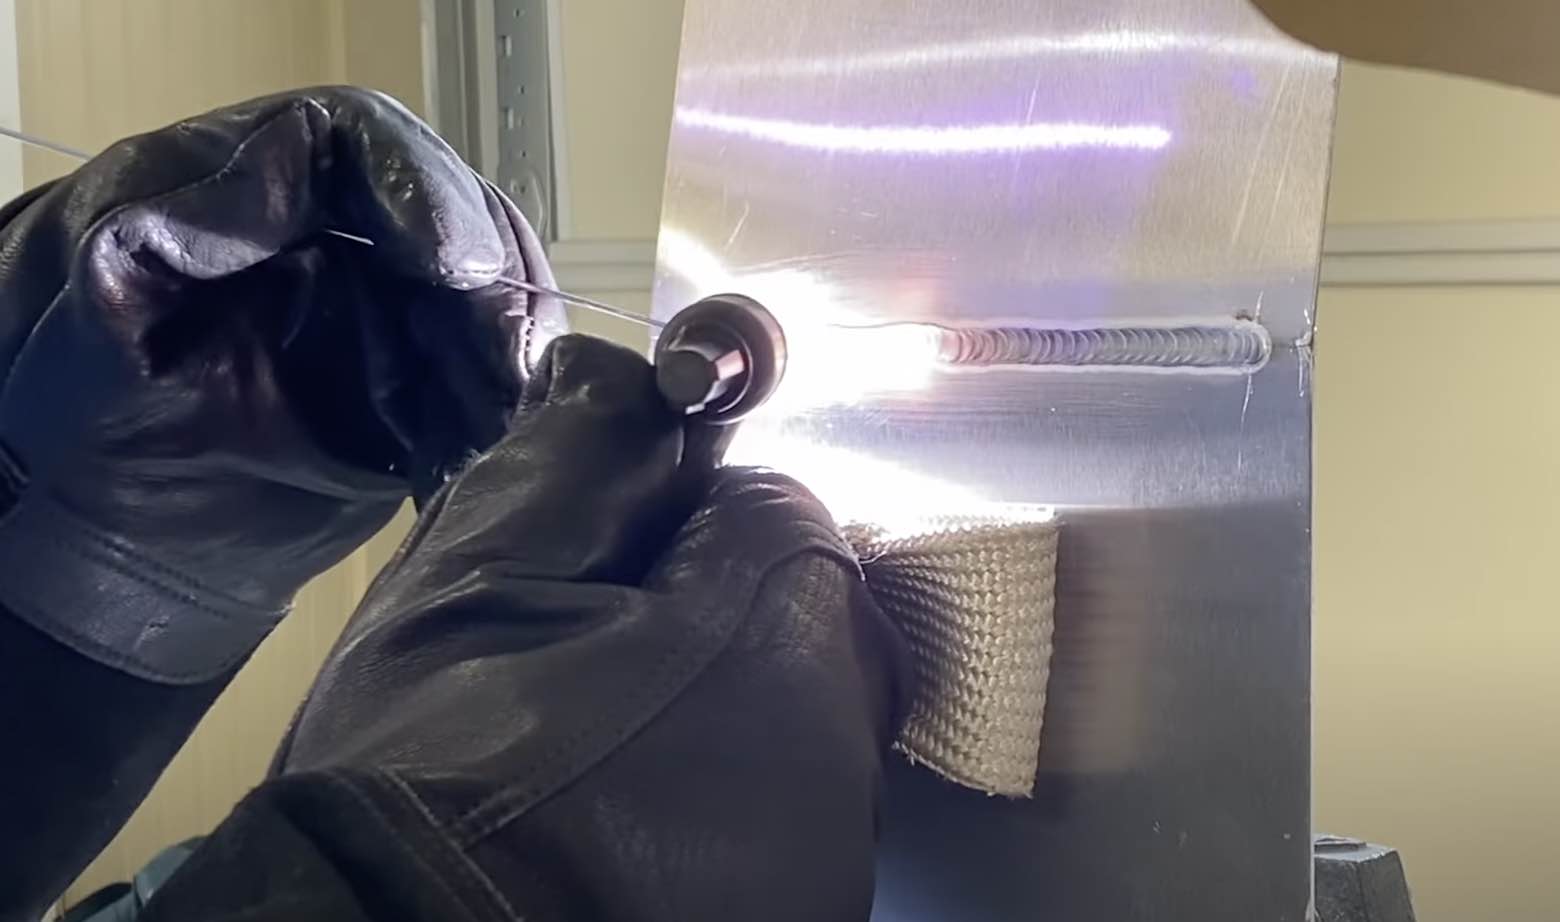
Preliminary Aluminum Weld procedure

A preliminary aluminum weld procedure is the first step to dialing in a good procedure
Is a full penetration bead on plate the same as a weld joint? Well it depends.
If it's a butt joint with no gap at all and a good fit, and the edges have been cleaned properly, then yes, it's almost the same as welding a full penetration bead on plate.
So now let's see if the same exact settings that achieve full and uniform penetration welding a simple horizontal bead will translate to a 2G butt joint.
Material type and thickness: 6061 aluminum .050”
Process : TIG/ GTAW
Joint type: square groove weld butt joint full penetration
Filler metal: 5356 1/16” diameter
Tungsten type and size: 2% lanthanated 3/32” diameter ( 1/16" would have worked better for crisper arc starts)
Position: Horizontal 2G
The idea here is to weld beads on the .050” thick 6061 aluminum sheet and to determine exact settings that consistently achieve full penetration.
And to then determine if those same exact settings will work on a 2g butt joint to achieve full consistent penetration.
Cleanliness of the weld area…especially the sheared edge is important and definitely affects how the bead penetrates and especially the surface texture of the penetration side.
Cup size and argon flow rate are also a factor because too much argon flowing can cause an erratic arc and too little argon flow rate will not achieve a clean puddle.
I used the Stronghand tools flow rate checker to make sure my gas flow rate was dialed in.
My first bead was welded with the machine amperage set to 43 amps using the Primeweld TIG325x.
AC frequency was set to 120hz ( a good all around setting ) with AC balance set to 33% cleaning.
First bead on plate was done without any wire brushing.
Then I wire brushed the last half of the back side and also reduced amperage to 40 amps.
There was a subtle improvement in appearance on the penetration area that was wire brushed.
So when it came to the actual 2G butt joints, I decided to weld one without wire brushing and the other wire brushed on both sides.
As expected, the best results came from the plate where the edges were cleaned using a deburring tool with both sides wire brushed using a clean stainless steel brush.
when developing an aluminum weld procedure, I guess those 3C s really are true for tig welding aluminum
- Clean
- Clean
- Clean
Some of the key factors to consider when developing a weld procedure are:
Material type
- Alloy Type: Determine the specific aluminum alloy (e.g., 5xxx, 6xxx, or 2xxx series) because different alloys have unique weldability and properties.
- Temper Condition: The temper (e.g., T6, O, etc.) affects how the material reacts to welding, including its susceptibility to cracking or distortion.
- Thickness: Material thickness dictates the welding technique, joint design, and heat input required.
-
Consider joint preparation:Proper edge preparation (cleaning and beveling if necessary) to ensure good penetration and fusion.Gaps or fit-up to accommodate aluminum's high expansion during welding.
Filler Metal Selection
- Choose the appropriate filler alloy based on the aluminum alloy being welded, the desired strength, corrosion resistance, and other properties.
- Common options: ER4043, ER4943, ER5356, etc.
- Match the filler metal to the base metal alloy for compatibility, service temperature, color match, and to avoid cracking.
Shielding Gas
- Use pure argon, argon-helium mix, or specialty gas like STARGON-AL for aluminum welding:
- 100% Argon: Suitable for TIG up to 1/4" thick
- Argon-Helium Mix: Enhances heat input for thicker aluminum sections.
- Set the appropriate gas flow rate to provide adequate shielding and prevent contamination.
Pre-Weld Cleaning
- Aluminum forms an oxide layer that has a much higher melting point than the base metal, making cleaning essential:
- Use a dedicated stainless steel wire brush, abrasive designed for aluminum, or chemical cleaner to remove oxide layers.
- Ensure the surface is free from oils, grease, and other contaminants.
- Clean both the base material and filler rod prior to welding.
Welding Parameters
- Set and document the following parameters:
- Amperage: Based on material thickness and welding process.
- Voltage: Especially critical for MIG welding.
- Wire Feed Speed (for MIG): Adjusted for proper deposition rate.
- Travel Speed: Ensures consistent bead size and penetration.
- Polarity: Use AC for TIG welding aluminum and DCEP (Direct Current Electrode Positive) for MIG welding.
Post-Weld Considerations
- Inspect the weld for defects such as porosity, lack of fusion, or undercut.
- Consider any necessary post-weld heat treatment to restore material properties if welding has altered the temper of the alloy.
- Perform quality checks, including visual inspection and testing as required (e.g., bend tests, x-rays).
Code or Standard Compliance
- Ensure the procedure complies with relevant codes or standards (e.g., AWS D1.2 for structural aluminum welding).
- Document all parameters and techniques in the preliminary procedure for review and qualification.


