Welding Aluminum 3g Vertical 6061 Aluminum Alloy
- HOME
- TIG WELDING ALUMINUM
- How to Tig Aluminum
- Welding Aluminum
This weekly welding video is on Tig welding aluminum in 3g position.
The 3 indicates vertical and the g indicates a groove weld. In this case it is a square groove weld because no bevel is used.
As far as welding positions go, 1g is flat, 2g is horizontal, 3g is vertical, and 4g is overhead.
3g means vertical and usually, tig welding vertical is usually done uphill. Not always but most of the time.
This joint is 11ga 6061 aluminum alloy. 11ga is 1/8" thick (3mm).
It takes about 100-125 amps to get complete penetration so the main amperage is set to 140 and I am using a foot pedal amperage control... something that is very useful for welding aluminum.
On an aluminum joint like this, at first it takes more amperage at first to get the puddle going and to get it penetrating.
Starting the weld in the middle like I did on this joint requires either a heat soak of a few seconds at around 125 amps, or a little more amperage like around 140 to get the penetration right .
After a few seconds, amperage is reduced using the foot pedal.
A small piece of aluminum like this gets fully saturated with heat pretty quickly.
That is another reason why I welded it using a back step method. By starting the weld in the middle of the joint, I can weld to the top with the piece getting too hot. Then I let it cool for a few minutes before welding from the bottom and and tieing in to start of the previous bead.
Its just one way of welding aluminum butt joints. But it does work well.
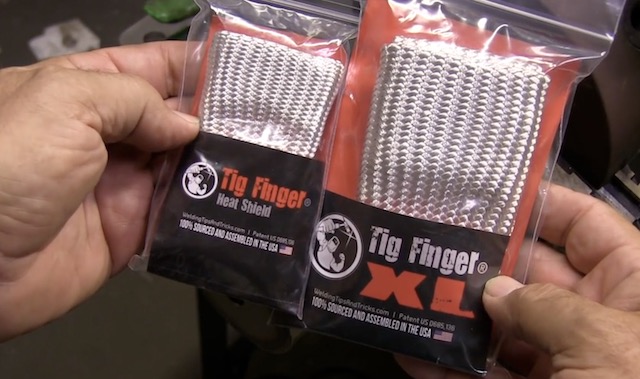
Also, I am using a Tig finger to help me prop my hand directly on the joint and so that my hand can slide up the joint smoothly.
Tig finger or no tig finger, you need to prop on something in order to have a steady hand.
A steady hand welds better.
Whether you clamp a C clamp near the weld and use it for a prop, or use a stack of two by fours, or a big ball of duck tape, or whatever,...do whatever it takes to prop your hand.
Or why not just get a tig finger and carry your prop in your back pocket?
For this video, I am using a Miller Dynasty 200dx with AC balance set to 65 and frequency set to around 70 (lately, I have been playing around with lower frequencies on inverters).
Also, I am using a CK flex loc 360 air cooled torch with a #7 gas lens, 3/32" 2% lanthanated tungsten and around 14cfh of argon flow.
Too much argon makes it hard to penetrate, but too little wont let the cleaning action of the arc work correctly and will allow oxidation in the puddle.
Since flowmeters are not always that accurate, you made need a bit more or less CFH. 14cfh worked ok for me.
Clean the aluminum before welding. The 6061 aluminum alloy I used was very clean except for some coolant from being saw cut.
So all I did was to give it a bath in acetone before welding.
The cleaning methods used depend on how dirty the metal is.
If aluminum is heavily oxidized, you might need to wire brush with stainless steel brush, or even use abrasives on it before welding.
Brand new aluminum like this, just needs an acetone wipe.
OF course it depends on the application too. If this were a test weld that was going to be x rayed, I would have filed the edges with a clean file, and used either a clean stainless wire brush or a silicon carbide fine sanding disc to remove oxides before welding. I might even have used a chemical cleaner.
But since this was a practice weld, a simple acetone wipe was ok.
Some more tips for getting a decent bead when welding aluminum in the 3g position:
- Find a way to prop that lets you maintain the same torch angle from start to finish of a bead. There will be a tendency to lean the cup back too far as you weld so be aware of that and try to keep the torch angle consistent.
- Keep your arc length pretty short. ....arc length should be about one electrode diameter. If you try to keep arc length too short, you will be dipping your electrode in the puddle often so if that happens , lengthen it a bit.
- Remember that aluminum is very conductive. That means you will need to compensate by adjusting amperage. At first more amps are needed, but after a few seconds, you will reduce amps...but then as you get close to the top edge of the joint, heat will be built up and you will need to reduce amps quite a bit.
- When tieing in to a previous weld, slow down as you melt in to the weld, add less filler, and overlap the previous weld a bit...then add a few drops of filler as you taper amperage and keep the torch moving as you taper amperage to avoid a crater crack.
See more tig welding aluminum videos


