How to Cut and Etch Welds
In this video, we are doing a bit of cut and etch testing….aka macro etch test.
2 of the most commonly welded metals are carbon steel and aluminum.
And fortunately, both are very easy to etch using simple household products
you can watch part 1 simple mig welding technique here
...because one cut and etch will tell you more than a hundred opinions.
Experimenting with a different technique? wouldn’t it be nice to be
able to see the results in just a few minutes while the memory of the
weld puddle was still fresh in your mind?
Trying out A new shielding gas? It might seem to work great… but is it penetrating as much as you think?
Tired
of hearing the same old arguments about pushing and pulling a short
circuit mig weld? One test can give you more information than a whole
bunch of opinions.
Cutting and etching a weld is a quick way to get some valuable information.
So. Why Cut and Etch?…because 1 test is worth a thousand opinions.

In a previous video, I was using a certain technique to see if it would work for all positions.
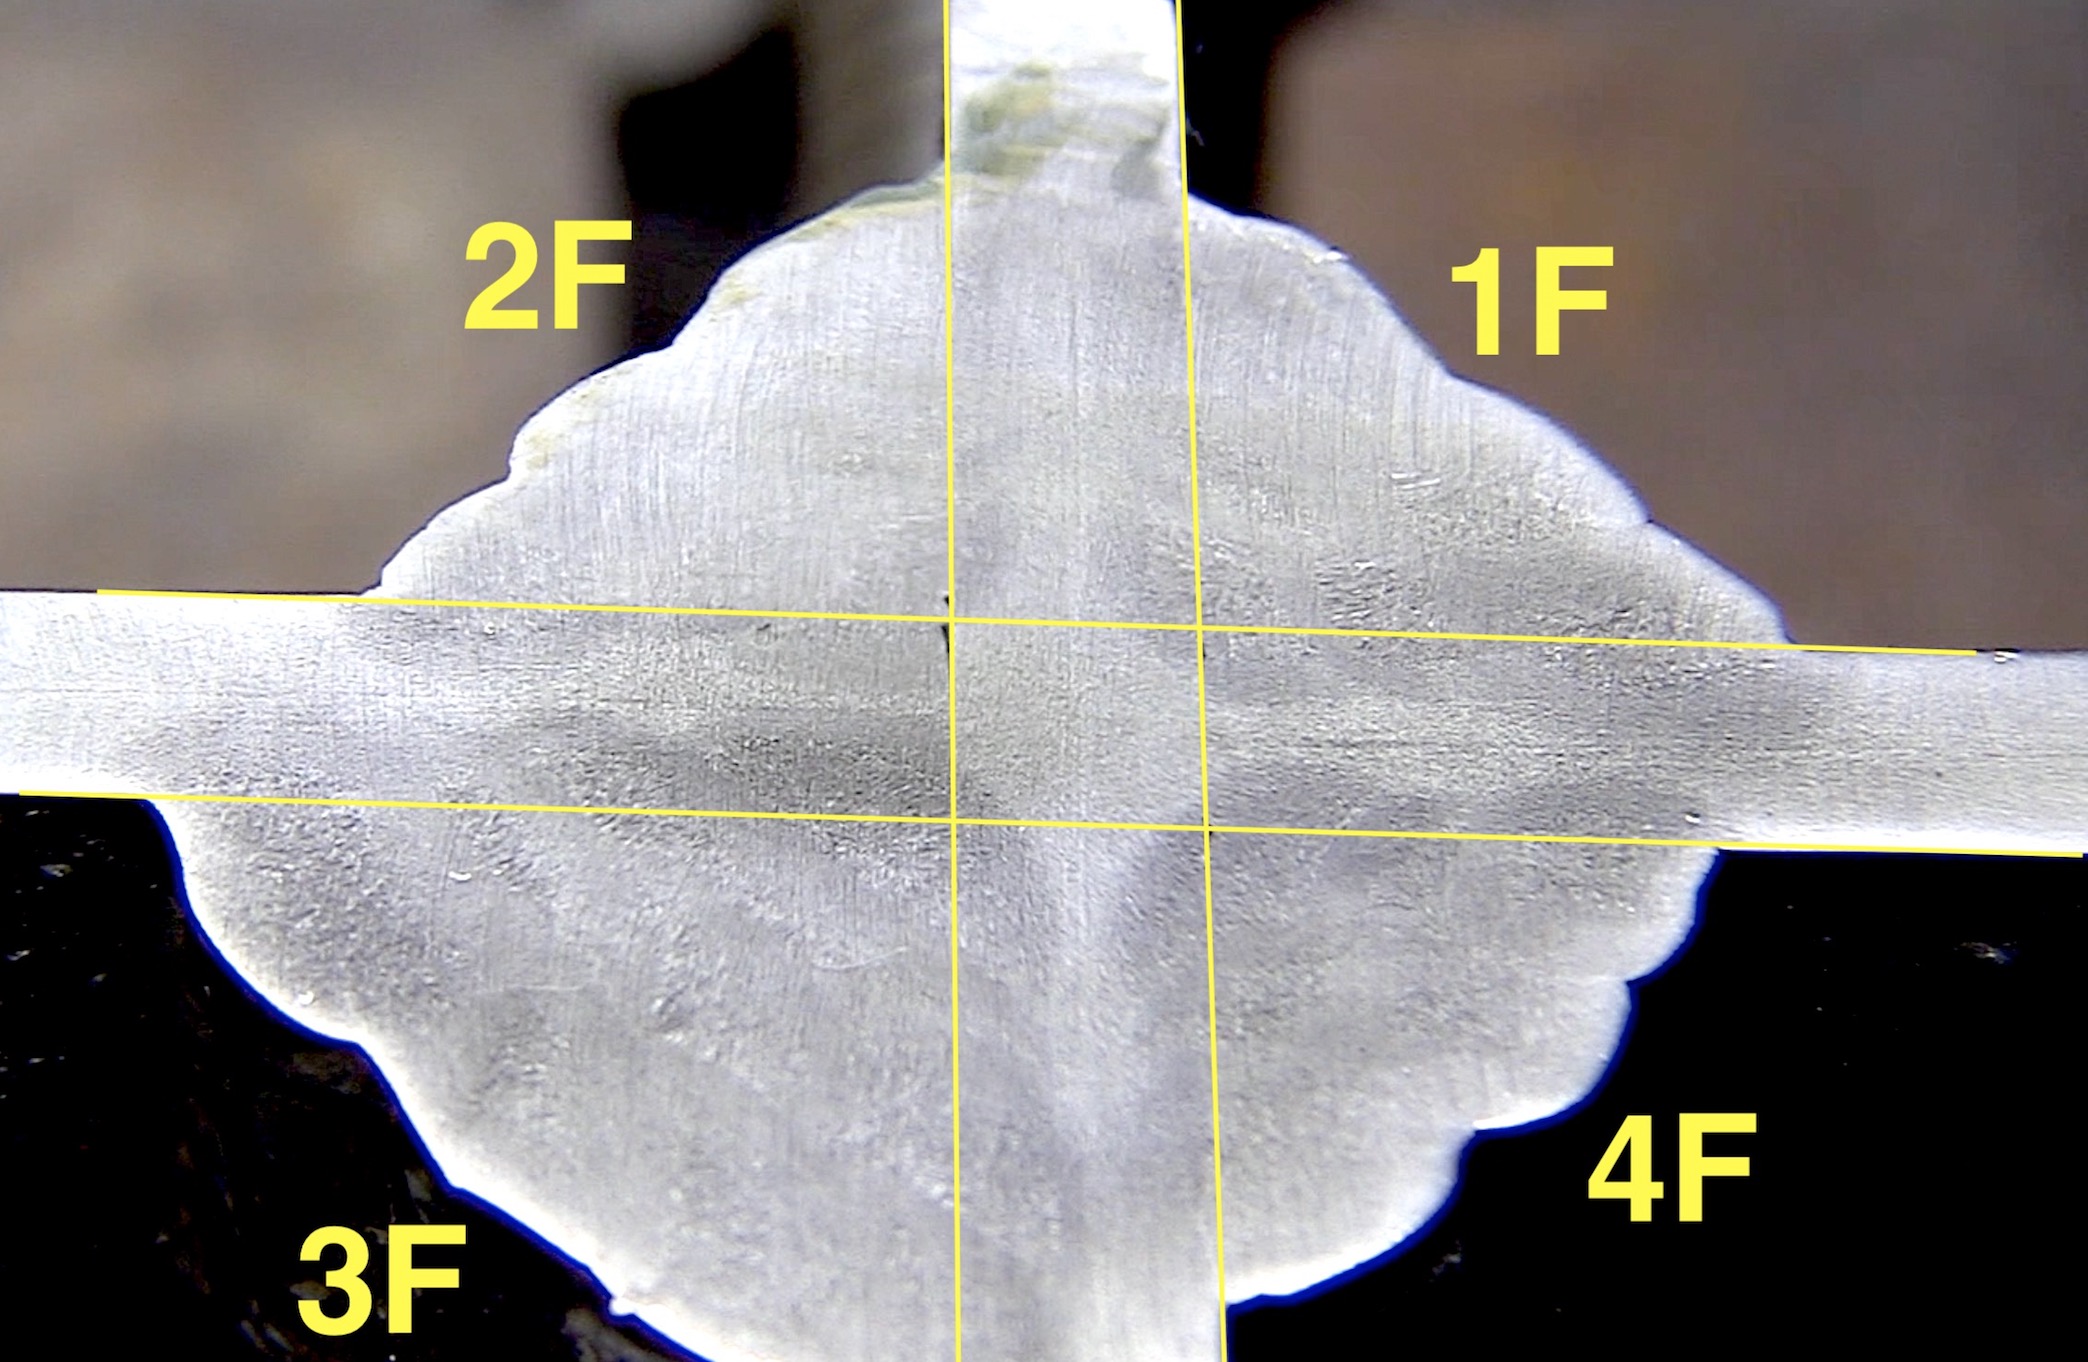
I welded a 1f, 2F, 3F, and 4F tee joint using the same exact technique.
And then I added a lot of extra beads to make this cut and etch video a bit more informative because a macro etch test can not only reveal lack of penetration but can also reveal porosity and inclusions if the sample is cut enough times.
Cutting
Let the sample completely cool down before cutting.
There are several ways you could cut a sample for a macro etch test.
Chop saw, hand grinder with cutting disc, band saw etc.
The smoother the cut, the less grinding and polishing is needed.
Sanding and Polishing
Once cut, you should be able to start the sanding with 50- 80 grit .
I used 50 grit on a belt sander for this video but I have also used a hand held grinder with a flap disc to remove saw marks and it works just fine.
I jumped right to a 120 grit belt after that and then moved on to a brown 3m scotch brite pad , then a red pad, and then a blue one.
I have since ordered several fine sanding belts for my belt sander so I will revisit this topic when those results are in.
Generally speaking the finer the polish, the better the etch detail but I have also achieved some pretty good results with only 120 grit paper.
Remember, you are not going to be examining the weld under high magnification so some sanding scratches are OK.
Etchants for cut and etch testing
There are several etchants that work on carbon steel with a 5% nitric acid solution being one of the best ones.... but one of the easiest ones to get is loctite naval jelly rust remover.
It takes a few minutes but it works pretty good and is available at hardware stores.
For Aluminum, Easy Off oven cleaner works and you can find it at most grocery stores...heck...you might already have some.
The final step is to examine the surface.
It really helps to take a photo because you can zoom in and also draw lines to determine the root of the joint.


